Pages

Pages

Tuesday, September 25, 2012

All Day Apple Butter

There's a theme in my kitchen right now: patience. Who knew I had it in me? But sometimes things are worth waiting for. And like yesterday's Belgian waffles, this apple butter is one of them.

Homemade apple butter

Overnight Apple Butter
makes approximately 1 pint

Ingredients
• 14 red apples [I used 2 bags of Braeburns because I like their slight tartness]
• Several shakes of cinnamon [I would guess it's around 2 tbsp]
• 1/2 cup sugar

Directions
Peel, core and chop your apples and place them in a crockpot. Add sugar and liberally sprinkle cinnamon on top. Mix to combine.


Turn your crockpot on low and leave overnight. Stir in the morning, and leave for several more hours until the apples are dark and broken down. It's not going to win any beauty contests, but it will smell amazing at this point.

After 16 hours of cooking on low

I like my apple butter smooth, so I used an immersion blender to achieve the silky texture. You can leave it chunky if you'd like though.


The amount of time that the butter takes depends on the apples you get. Mine took around 16 hours. You can speed up the process by turning it on high after several hours, but I think low and slow cooks best.

This is a great base recipe that you can doctor up however you please. Add nutmeg or cloves to give it a spicier taste, or add vanilla to make it much sweeter. It's up to you!

I recommend serving this over a nice, warm scone. Enjoy!

Monday, September 24, 2012

Overnight Belgian Waffles: Worth it!

According to Pinterest, I pinned this Belgian waffle recipe 27 weeks ago. I'm not sure what took me so long to finally make them, but it could have something to do with the 18-hour cook time!

Belgian Waffle [source]

Ok, most of that is not hands-on cooking time, but still, it's a long time to wait for waffles. You know what though? They were totally worth it! Do yourself a favor--find some Belgian pearl sugar and make these waffles.

Recipe, slightly adapted from here.

Overnight Belgian Waffles
makes 10 waffles

Ingredients
• 3 tsp active dry yeast
• 1/2 cup whole milk at 110-115 degrees
• 1/4 cup + 2 tsp of water at 110-115 degrees [I added milk and water together and microwaved for 20 seconds]
• 4 cups bread flour
• 2 large room temperature egg, lightly beaten
• 2 tbsp + 2 tsp light brown sugar
• 1 1/2 tsp salt
• 8 1/2 ounces soft room temperature unsalted butter [don't think too much about this or you'll never make these!]
• 2 tbsp honey
• 4 tsp vanilla
• Several handfuls of Belgian Pearl Sugar [I used Parelkorrel]

Directions
1. After warming milk and water, pour into the bowl of a standmixer and add yeast. Stir for a few seconds to moisten yeast.

2. Add eggs and 1/3 of the total flour. Mix to blend. Scrape down sides of bowl.

3. Sprinkle remaining flour over the mixture, but do not stir it in. Cover and let stand 75-90 minutes (at the end of that time, you’ll notice the batter bubbling up through the cover of flour.)

4. Add brown sugar and salt to the dough. Mix on low speed – just to blend.

5. With machine on low, add honey and vanilla. Then add 2 tbsp of butter at a time. Mix 4 minutes at medium-low speed; scrape down sides once or twice in that period. Let the dough rest for 1 minute and then continue to mix for 2 minutes. Let the dough rest for 1 more minute and mix for another 2 minutes. Dough should start balling up around the paddle.

6. Scrape the dough into a large bowl, sprinkle lightly with flour, cover with plastic wrap and let rise at room temperature for 4 hours.

7. REFRIGERATE FOR 30 MINUTES BEFORE PROCEEDING TO STEP #8.

8. Gently deflate the dough and add several handfuls of pearl sugar. Add a bit more than you think is necessary :) [I didn't add pearl sugar until the next day, per the original instructions. After a bit of experimenting, I discovered adding the sugar earlier helps it dissolve better.]

9. Scrape the dough onto a piece of plastic wrap, and then use the spatula to press the dough into a long rectangle. Fold that rectangle over on itself (by thirds – like a letter). Wrap it in plastic, weigh it down a bit (I put two dinner plates on top of it) and refrigerate overnight.

10. When you are ready to cook your waffles, take the dough out of the fridge and separate in to 10 chunks. Cover loosely in plastic wrap and leave for 90 minutes.

11. Cook each waffle for around 5 minutes, or until dark and caramelized.


Step 3: It looks wrong, but it's right

Step 3 after 90 minutes

Step 6

Step 9 [add pearl sugar first though]

Step 9

Step 9--in the fridge overnight
Step 10


Look at that gorgeous caramelization. It tastes crunchy and sweet and is a little bit sticky--just how I remember them from Belgium!

Friday, September 21, 2012

Design Dilemma

I've mentioned a couple of times that I was in the market for two additional kitchen chairs. I have the two that I made-over (and still love), but the other two are still on loan from Dan's work.

My current kitchen chairs

After hunting for a few weeks, I finally found a great deal on chairs on Gumtree.  I was able to get four chairs for only £20.

New kitchen chair


I love the lines of the chairs. Classic, but with a twist. I don't love the fabric though. My initial plan was to paint and upholster two chairs to match my existing chairs, and then use the other chairs as spare seating. The thing is though, these chairs are in really good condition. The wood is a gorgeous cherry and it seems like a shame to paint over it. So now I have a bit of a design dilemma.

I don't love the way the chairs look with my existing chairs. Something about the cherry wood and the purple just isn't doing it for me.


I think I may scrap my initial plans and just re-upholster all four new chairs and move the purple chairs somewhere else.

I found a bunch of fabric online that I love. Will any of these work with the cherry wood chair, gray table, and crazy kitchen tiling?

Kitchen backsplash

I need your help! Which of these do you like and think will work in my kitchen?

Sources: 1, 2, 3, 4, 5, 6, 7

Thursday, September 20, 2012

Day Trip From Prague: Cesky Krumlov

As I mentioned in this post, Dan and I celebrated our 4th wedding anniversary in the Czech Republic. Before we left we planned on spending all three days touring Prague. We heard from several people once we got there that we should take a day trip to a nearby town called Cesky Krumlov. Since the bus tickets were only 8 Euros each way, we figured we'd give it a shot.

Cesky Krumlov

Cesky Krumlov was easily one of my favorite places we've been so far. It is absolutely gorgeous! It's three hours south of Prague near the Austrian border. It's proximity to Austria gives it a definite Bavarian feel.


Like many European towns, this city has a castle situated on a river--it's actually the same river that flows through Prague (the Vltava). The castle was nice, but the grounds were more impressive. Following a tradition from the 16th century, they still keep a live bear in the castle moat!


Since the day was so nice we decided to rent a canoe and row around the town. I cannot think of a better way to spend the afternoon. I loved seeing the city from the water. It was really fun too! The water was very calm, but we had to navigate through a few canals that were like mini-rapids. 

A "bar" on the river


We capped off our awesome day trip with a traditional Bavarian vegetarian feast by the river. 

Bavarian feast

If you're in the Czech Republic, I highly recommend a day trip to Cesky Krumlov!

Anniversary Weekend in Prague

Dan and I celebrated our 4th wedding anniversary on September 7th. Yay! It seems like just yesterday we were kissing in front of the Krispy Kreme donut shop on our first date (scandalous!), and then again on our wedding day. What a ride it's been.

September 7, 2008

To celebrate our anniversary, we took a weekend trip to the Czech Republic. We spent two days in Prague and took a day trip outside the city for another day. We absolutely loved Cesky Krumlov, and would highly recommend it to anyone. I'll talk more about it in another post though.

Since we knew we only had two days in Prague, we hit the ground running. We scheduled a free walking tour of the Old Town for the afternoon of the first day, and saw the castle and the Jewish Quarter on our last day.

View of Prague Castle

View of Charles Bridge

We saw the St. Nicholas Cathedral, a gorgeous space with some interesting statues. 

Forced baptism

Of course we wasted no time in trying a Prague pastry. It's called a trdelnik, and it's dough wrapped around a stick and roasted on an open fire. It's served warm with cinnamon or powdered sugar. I enjoyed it, but I like my pastries with a little more oomph...this was a little too light for me.

Traditional trdelnik

Old Town is absolutely gorgeous. We saw the famous astronomical clock, but we weren't around when it started its hourly show. I've seen it before though and it's actually a bit of a let down. The clock itself is gorgeous though!

Old Town, Prague

Our tour guide was fantastic. He was really entertaining, but also informative. My favorite tidbit from him is that the Czech national anthem is called "Where is My Home." It refers to the fact that the country has been occupied by so many different powers during its history. However, many locals think the real meaning of the anthem has less to do with history and more to do with beer. Czechs drink more beer per capita than any other nationality. At the end of each night they might be asking themselves, "where is my home." Ha!

To fit in with the local culture, Dan and I decided to do a beer tour with the same guide from our afternoon tour. We went to a few places, including the Prague Beer Museum Pub which has 30 beers on tap! We did a sampler and I was surprised to find that I loved the grapefruit beer. So refreshing! I learned that the darker the Czech beer, the sweeter it is. I also learned the many rules for beer drinking in Prague (e.g. maintain eye contact while clinking glasses; don't spill your beer; use a coaster, etc.).

Beer sampler at Prague Beer Museum

We managed to squeeze the castle and the Jewish Quarter into our last day. The castle is actually made of up several buildings, including St Vitus Cathedral, and is the biggest castle in the world.

Prague Castle

St Vitus Cathedral

I was really impressed by the cathedral. It is absolutely enormous and the stained glass is gorgeous. Even the ceiling was special.

St Vitus Cathedral

The afternoon in the Jewish Quarter was very moving. Jews have been living in Prague since at least the 10th century. While it's fantastic that the synagogues and cemetery are so well-preserved, the reason behind it is pretty disturbing. Hitler planned to retire in Prague once he won WWII. He left the Jewish Quarter intact in order to create "an exotic museum of an extinct race."

15th century Jewish cemetery

Spanish Synagogue

Spanish synagogue

Franz Kafka statue

Since I can't leave you on that depressing note, here's something to lift your spirits. If you happen to keep kosher and find yourself in Prague, don't worry. You can still drink the absinthe!


Sunday, September 16, 2012

LiveStrong

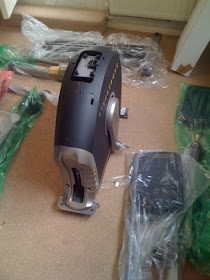
Staying away from the whole Lance Armstrong controversy, I just bought a new elliptical. It's a LiveStrong LS8.0E. Dan and I took a couple of hours today and put the sucker together. I'm actually blogging while using it for the first time. I'll let you know how it goes!


Saturday, September 15, 2012

Update to my Shabby Chic Dressers

Remember when I sanded, stained and painted these dressers to make them shabby chic?

After
Before


I'm still loving the way they look, but I thought I could make them even better. Once again I drew inspiration from the Petersiks. I adored the sweet surprise of color they added by lining their nursery dresser drawers.

Young House Love's dresser drawers [source]

Adding drawer liners to my bare wood drawers seemed like a fairly simple task that would have a big payoff. Spoiler alert: it worked!

The first thing I needed to do was gather supplies. I found some pretty gift wrapping paper at my local post office. I bought three sheets in different patterns for £1.99 each. I was able to get two drawers out of each paper.

I also found glue at the post office for £1.99. I saw on Pinterest that you can make your own Mod Podge with a simple water and glue mixture. I grabbed a glass jar from my recycling bin and added half glue and half water.

Homemade Mod Podge: half glue; half water

With supplies in hand I was ready to get started. To make life easier, I used printer paper to create a template for my drawers. I used that template to cut out my wrapping paper to size. It's much easier than measuring!

Make a paper template of your drawer

With my paper cut, I brushed a thin layer of my homemade Mod Podge on the drawer. Make sure you brush it on the drawer and not on the bottom of the paper. The paper will get too soggy and it won't stick as well.

Brushing Mod Podge on the drawer

I tried to avoid bubbles and wrinkles by starting in one corner and smoothing it out as I went along. It worked OK, but I think starting in the center and slowly working out might have been better.


Once I had all the paper in the drawers, I let it dry for a few hours. Then I brushed another thin layer of Mod Podge on top. Hopefully this will give it a bit more protection for the long-haul.


Finally the drawers were ready to move back home.


Keen observers might note that the dresser itself got a little shabbier. I decided that they were too chic with not enough shabby, so I went back and sanded some of the edges down. I am very happy with the result. It looks much more distressed and edgy and much less fresh from IKEA.


His and hers dressers

Not bad for a project that cost me £7.96 ($12.91). This was a super easy project that makes a big difference. Why did it take me three months to finally do this?