 |
| Packing!! |
Tuesday, January 17, 2012
What I'm Up To
I hoped to blog about my wonderful new kitchen table today, but, it's not exactly going as I hoped it would. I'll fill you in on the details soon. In the meantime, here's what I'm up to:
I leave for Egypt on Friday morning!! I still can't believe it's really happening. Yay!!

Monday, January 16, 2012
Road Trip to Durham
Dan and I took advantage of the long weekend with a mini-roadtrip to Richmond and Durham. Richmond is only around 45 minutes away, and Durham is only around an hour and a half. Even though we could easily have visited these places and driven back home, there is something about staying overnight in a city that helps you appreciate it more. We found a cute bed and breakfast in Durham and made a weekend of it.
As English Heritage members, we got a free, semi-private tour of the Richmond Castle. It was great hearing all the history behind the building. And we got to see the prison cells where the conscientious objectors were held during WWI. The cell walls are covered in amazing graffiti. The site is so fragile that it is usually closed to visitors, but we were given special access.


Next we drove on to Durham. We checked in to our B&B and took a leisurely stroll around the cute little college town. After a pint at the local pub, we went searching for dinner. Dan found a great place called Oldfields that specializes in locally sourced cuisine. It was fantastic!
The next morning we had a great home-cooked meal. Dan had the smoked kipper, which is a local specialty.
Sunday is a terrible day to visit Durham because so many things are closed. We made the most of it though and saw everything we could.


We even got a great, private tour of the cathedral from the cutest old lady I've ever met. Ms. Mead must have been around 95 years old and has been volunteering at the cathedral for more than 15 years. There weren't supposed to be any tours on Sunday, but she offered to take us around to share her knowledge. An hour later, her supervisor found her and made her leave us. Apparently she was supposed to be collecting tickets and not giving tours. He actually seemed kind of mad about it, but she just smiled and said "am I forgiven?" He sighed and said, "of course you are."
As English Heritage members, we got a free, semi-private tour of the Richmond Castle. It was great hearing all the history behind the building. And we got to see the prison cells where the conscientious objectors were held during WWI. The cell walls are covered in amazing graffiti. The site is so fragile that it is usually closed to visitors, but we were given special access.




 |
| View from top of Richmond Castle |
Dan walked away from the castle with a new toy: a wooden trebuchet. He plans to use it at work to launch missiles at his co-workers. Ah, boys :)

Next we drove on to Durham. We checked in to our B&B and took a leisurely stroll around the cute little college town. After a pint at the local pub, we went searching for dinner. Dan found a great place called Oldfields that specializes in locally sourced cuisine. It was fantastic!
The next morning we had a great home-cooked meal. Dan had the smoked kipper, which is a local specialty.
 |
| Smoked kipper |
Sunday is a terrible day to visit Durham because so many things are closed. We made the most of it though and saw everything we could.
 |
| View of castle and cathedral |


We even got a great, private tour of the cathedral from the cutest old lady I've ever met. Ms. Mead must have been around 95 years old and has been volunteering at the cathedral for more than 15 years. There weren't supposed to be any tours on Sunday, but she offered to take us around to share her knowledge. An hour later, her supervisor found her and made her leave us. Apparently she was supposed to be collecting tickets and not giving tours. He actually seemed kind of mad about it, but she just smiled and said "am I forgiven?" He sighed and said, "of course you are."
Friday, January 13, 2012
Spouses on Sabbatical
You've heard me mention Ladies of Leisure before (here). Welcome to the new and improved group called Spouses on Sabbatical (S.O.S). We added several new people, including our friend Nick (hence the name change), and held our inaugural meeting this week. First order of business was to draft a list of projects that we each hoped to accomplish during our weekly S.O.S. meetings. Here's my list:
- makeover a kitchen table
- finish my pine box
- make at least two t-shirt pillows (from Brooklyn Limestone)
- continue learning Russian
- find/makeover two chairs for the living room bay window
- find/makeover two nightstands for the guest bedroom
- find/makeover kitchen table chairs
- make a light fixture for exercise room (like this)
- buy/make artwork for above the living room couch (really want this, but they can't ship it here)
- lean how to use my Panasonic Lumix to take better pictures
It's a pretty lofty list, but I plan on making my way through it. In fact, I'm almost done with the first item on that list. More details on that later.
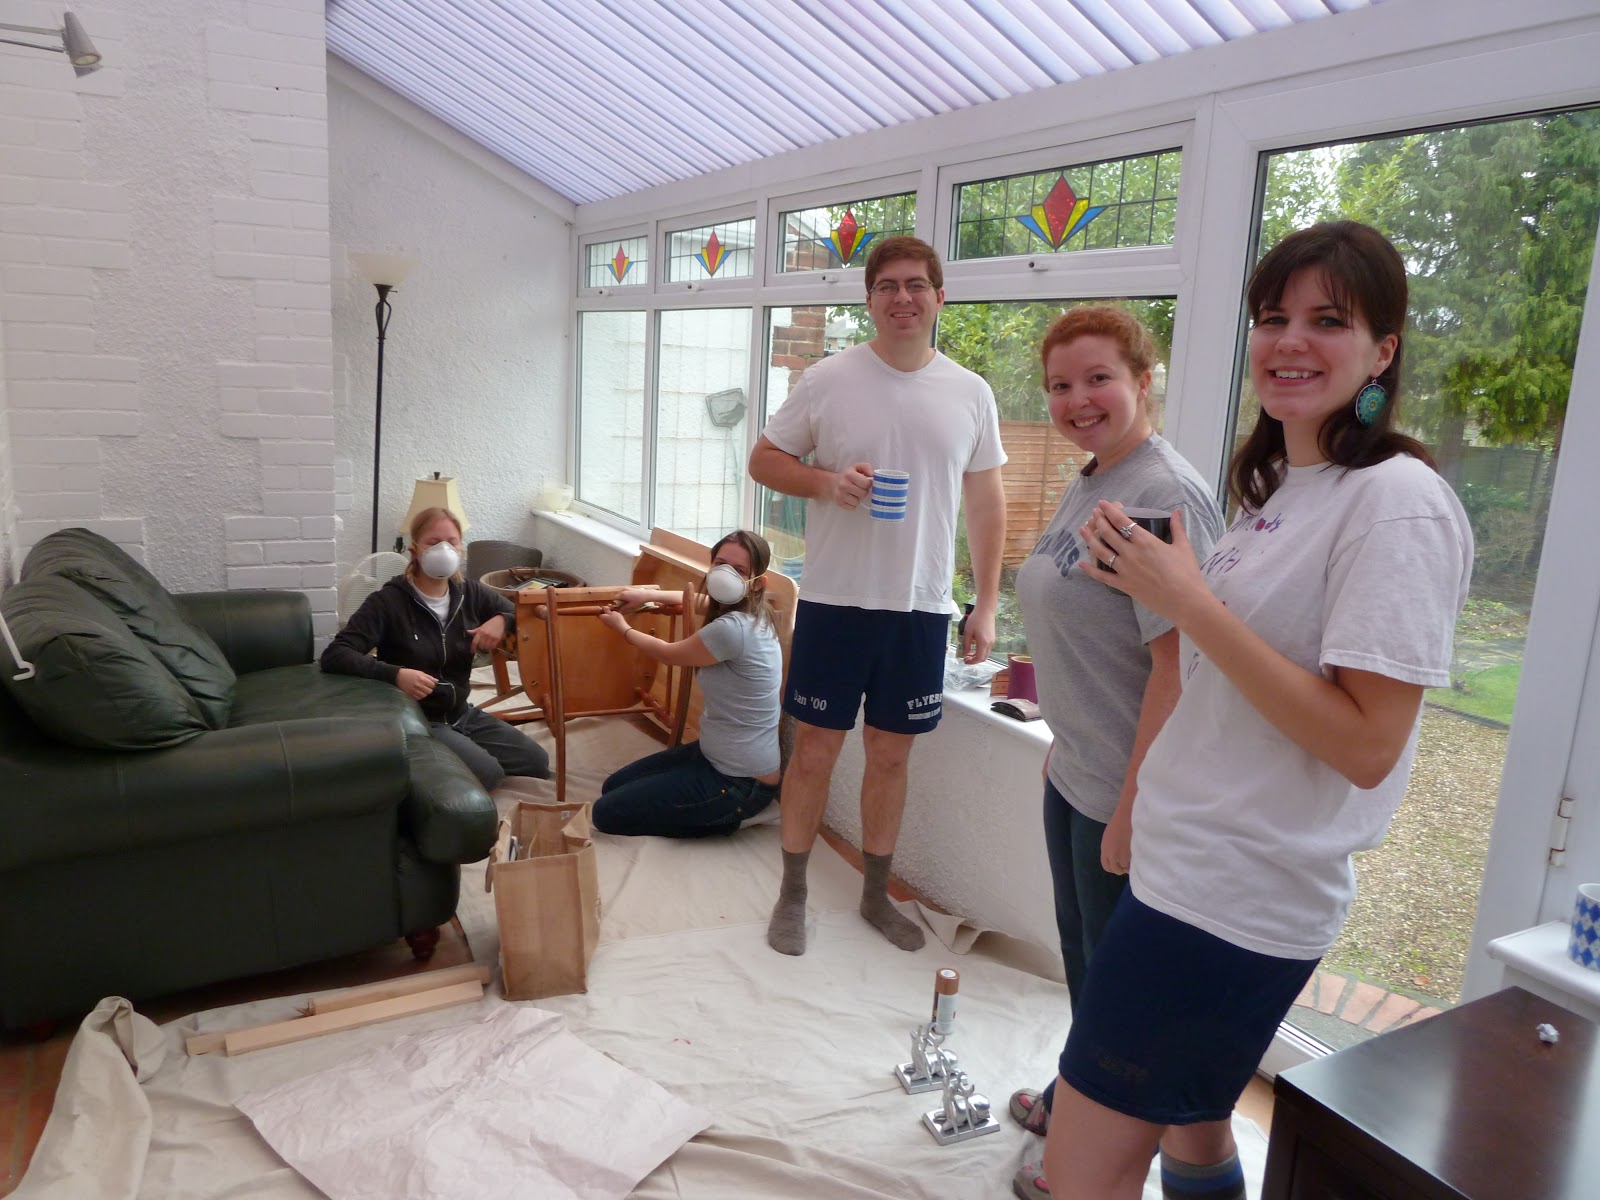 |
| Alisha, Rachel, Nick, Karen and Katie |
 |
| Karen spray-painting her reindeer |
 |
| Alisha and Rachel sanding |
 |
| Katie and Nick sanding |
 |
| All hands on deck |
What a fun, productive afternoon! I can't wait until next week when I'll start on my pillows.
Wednesday, January 11, 2012
Living Room Updates
As you may have noticed in yesterday's post, we've updated the living room since you've last seen it. Dan said my post yesterday was misleading because it looks like I turned that tiny light-wood table into a big square dark-wood one. Obviously, that's not what happened. :)
When we first moved into the house, Dan's work lent us a bunch of furniture. Since we gave our couches and coffee table to my sister before we moved, we would have had a naked living room without some loaner furniture. For the living room, we borrowed a couch, a coffee table, a chair and an end table. We also borrowed a kitchen table and chairs, and a bed and nightstands for the guest room. We've given some of the furniture back as we've started to acquire our own (couch, and bed).
Time is ticking though and in a few days we have to give the rest of the furniture back. We knew we couldn't live without a coffee table, so the pressure was on to find a great one. After searching high and low, we ended up back at my frenemy IKEA. I really wanted to do something different and cool for a coffee table, like a wooden chest, but that didn't work. I did buy a big wood box, but it was too big to use as a coffee table.
IKEA had the best options for us in the right price range. We knew we wanted something square and low. This guy fit the bill perfectly. It's 35.5in x 35.5in and sits right at the couch level. It's almost like they were made for each other...hmm...

To make him last a little bit longer, we decided to buy a glass top. I've never had glass tops on my furniture before, but the idea was that this will prevent scratch marks and water rings and will generally make it more user friendly. We commissioned a local glass company to build the top for us at a really reasonable price. I wasn't sure how I'd feel about it at first, but I actually love it. It's so freeing to be able to set anything down and not worry about scratching or scarring the table.
We replaced the green chair with a comfy new arm chair, also from IKEA. I promise I'm not sponsored by them (not that I'm opposed to that...hint, hint IKEA). Again, this just fit the bill. It's hard to tell in the picture, but he's a dark brown almost tweed-type fabric. I love the rough-looking texture, but it is actually really soft in person.

He's on the wall opposite the bay window. It's a perfect little spot for my wood box to be used as a side table! Once I finish the wood in a walnut stain, it's going to look very elegant and a bit manly. Can you picture it?

Now that we've found replacements for the coffee table and green armchair, it's on to the kitchen table. Don't worry...I'm on it!
When we first moved into the house, Dan's work lent us a bunch of furniture. Since we gave our couches and coffee table to my sister before we moved, we would have had a naked living room without some loaner furniture. For the living room, we borrowed a couch, a coffee table, a chair and an end table. We also borrowed a kitchen table and chairs, and a bed and nightstands for the guest room. We've given some of the furniture back as we've started to acquire our own (couch, and bed).
 |
| We borrowed the green chair and coffee table |
Time is ticking though and in a few days we have to give the rest of the furniture back. We knew we couldn't live without a coffee table, so the pressure was on to find a great one. After searching high and low, we ended up back at my frenemy IKEA. I really wanted to do something different and cool for a coffee table, like a wooden chest, but that didn't work. I did buy a big wood box, but it was too big to use as a coffee table.
 |
| Awesome chest, but too big for coffee table |
IKEA had the best options for us in the right price range. We knew we wanted something square and low. This guy fit the bill perfectly. It's 35.5in x 35.5in and sits right at the couch level. It's almost like they were made for each other...hmm...

To make him last a little bit longer, we decided to buy a glass top. I've never had glass tops on my furniture before, but the idea was that this will prevent scratch marks and water rings and will generally make it more user friendly. We commissioned a local glass company to build the top for us at a really reasonable price. I wasn't sure how I'd feel about it at first, but I actually love it. It's so freeing to be able to set anything down and not worry about scratching or scarring the table.
We replaced the green chair with a comfy new arm chair, also from IKEA. I promise I'm not sponsored by them (not that I'm opposed to that...hint, hint IKEA). Again, this just fit the bill. It's hard to tell in the picture, but he's a dark brown almost tweed-type fabric. I love the rough-looking texture, but it is actually really soft in person.

He's on the wall opposite the bay window. It's a perfect little spot for my wood box to be used as a side table! Once I finish the wood in a walnut stain, it's going to look very elegant and a bit manly. Can you picture it?

Now that we've found replacements for the coffee table and green armchair, it's on to the kitchen table. Don't worry...I'm on it!
Tuesday, January 10, 2012
Hey Good Lookin'
Is it weird to cat call furniture? If so, I may be in trouble. It's just that my sofa looks so good!

Following the advice of John and Sherry Petersik from Young House Love, I decided to give my sofa a little spray-tan makeover. The couch came with the standard IKEA birch legs. They're fine and I probably would have left them if I hadn't seen what a difference paint can make.
First step was to take the legs off the couch. That meant we were chilling on this for about a week:

Next, I set up shop in my woodworking studio (a.k.a. home decor shop, a.k.a. conservatory). I laid down a plastic tarp and got to work sanding the birch legs to remove the clear varnish on them. This step helps the spray paint stick better. I used 80 grit and sanded by hand. It only took about 30 minutes to do 8 of them.

Then came the fun part...spray painting. I get really nervous before I paint. I know that's crazy, but I guess I'm worried that I'll mess it up and it will be a waste of time and money. I give myself little pep talks to remind myself that it can all be undone with a little more sanding.
I went with the same spray paint that the Petersiks did and followed their advice of doing thin, even coats. I chose Rust-Oleum's Oil Rubbed Bronze because I liked the idea of having a dark leg that also had a little bit of shimmer. It's nothing too noticeable, but in the right light it gives the legs a little more depth.
I let the legs cure for about 48 hours. The can says it only needs 24, but I would rather wait a little longer and make sure they are really dry before putting them back on the couch.
Just to remind you, here's what it looked like before the legs were painted:
And here's the final product:
I think it makes such a difference. I love the way it looks and I feel proud that I did it on my own...even if it is a relatively small project. It's hopefully the first of many!

Following the advice of John and Sherry Petersik from Young House Love, I decided to give my sofa a little spray-tan makeover. The couch came with the standard IKEA birch legs. They're fine and I probably would have left them if I hadn't seen what a difference paint can make.
First step was to take the legs off the couch. That meant we were chilling on this for about a week:

Next, I set up shop in my woodworking studio (a.k.a. home decor shop, a.k.a. conservatory). I laid down a plastic tarp and got to work sanding the birch legs to remove the clear varnish on them. This step helps the spray paint stick better. I used 80 grit and sanded by hand. It only took about 30 minutes to do 8 of them.

Then came the fun part...spray painting. I get really nervous before I paint. I know that's crazy, but I guess I'm worried that I'll mess it up and it will be a waste of time and money. I give myself little pep talks to remind myself that it can all be undone with a little more sanding.
I went with the same spray paint that the Petersiks did and followed their advice of doing thin, even coats. I chose Rust-Oleum's Oil Rubbed Bronze because I liked the idea of having a dark leg that also had a little bit of shimmer. It's nothing too noticeable, but in the right light it gives the legs a little more depth.
 |
| Very thin first coat |
 | ||
| After 3 thin coats |
 |
| Couch legs before |
And here's the final product:
I think it makes such a difference. I love the way it looks and I feel proud that I did it on my own...even if it is a relatively small project. It's hopefully the first of many!
Fantastic Chanukah Gift!
I'm a little late posting about Chanukah 2011 seeing as it's already a whole new year. Nevertheless, it would be a crime not to show you the awesome Chanukah present Dan gave me this year: four petite round casserole dishes from Le Creuset in teal!! Aren't they the cutest things?

My first order of business was figuring out what to make. I have a list a mile long of things that I will eventually make (mini pies, lasagna, apple crumble, chocolate lava cake, french onion soup, cocotte egg with creamed mushrooms), but I decided to use ingredients I had on hand so I could make something immediately. So, my first petite round casserole dish was Welsh rarebit!

Welsh rarebit is basically fondue with beer that is served over bread. What's not to love? It's pretty easy to make and is so delicious! Serve it with some veggies and apple slices (as my friend Tom recently showed me), and it's pure heaven.


My first order of business was figuring out what to make. I have a list a mile long of things that I will eventually make (mini pies, lasagna, apple crumble, chocolate lava cake, french onion soup, cocotte egg with creamed mushrooms), but I decided to use ingredients I had on hand so I could make something immediately. So, my first petite round casserole dish was Welsh rarebit!

Welsh rarebit is basically fondue with beer that is served over bread. What's not to love? It's pretty easy to make and is so delicious! Serve it with some veggies and apple slices (as my friend Tom recently showed me), and it's pure heaven.

Friday, January 6, 2012
Gallery Wall
It's finally finished! It took forever, but my gallery wall is now hanging proudly in the upstairs hallway!
I've wanted a gallery wall for a long time for a few reasons. I think they look really neat, allow you to show off a lot of different pieces of work, and they take up a good amount of space. Since Dan and I love traveling, I knew that I wanted to highlight some of our favorite places on our wall.
My mom and I started this project when she came out to visit for Thanksgiving. First we had to figure out how many pictures we wanted to use. I looked in my favorite home decor shop to see how many black frames I already had. Amazingly, I had 13! That seems like a lot, but I guess they were spread out around the house in DC so it didn't seem like that many.
Next we looked through all of my travel pictures on Picasa. I have hundreds upon hundreds, so this step took forever. I wanted to make sure that each picture we picked could stand alone as an awesome picture, but would look great among the other 12 too.
Then we laid out the frames on the floor so we could see what we like best. I was going for an organic, flowing shape. That way, the frames didn't need to be hung perfectly, and I could easily add to the layout if I ever wanted to. Good thing, because I ended up adding three more frames later to make a total of 16.
Now that the frames were actually on the wall, I ordered the prints. I ended up with ten 4 x 6s; one 5 x 7; three 8 x 10s; one 3.5 x 3.5 and one A4. A4 is the standard British paper size. I found three cheap frames (the 3.5 x 3.5, the A4 and a 4 x 6) at a local market for less than £9. The prints were all really cheap, so the total cost for the gallery wall was less than £12 (around $18.50)!

I really love the way it turned out! This wall is the first thing I see when I come out of my bedroom in the morning and I have a great view of it from my dressing room. It turned an ordinary wall into a happy-memory-filled art gallery. And all for less than $20!
I've wanted a gallery wall for a long time for a few reasons. I think they look really neat, allow you to show off a lot of different pieces of work, and they take up a good amount of space. Since Dan and I love traveling, I knew that I wanted to highlight some of our favorite places on our wall.
My mom and I started this project when she came out to visit for Thanksgiving. First we had to figure out how many pictures we wanted to use. I looked in my favorite home decor shop to see how many black frames I already had. Amazingly, I had 13! That seems like a lot, but I guess they were spread out around the house in DC so it didn't seem like that many.
Next we looked through all of my travel pictures on Picasa. I have hundreds upon hundreds, so this step took forever. I wanted to make sure that each picture we picked could stand alone as an awesome picture, but would look great among the other 12 too.
Then we laid out the frames on the floor so we could see what we like best. I was going for an organic, flowing shape. That way, the frames didn't need to be hung perfectly, and I could easily add to the layout if I ever wanted to. Good thing, because I ended up adding three more frames later to make a total of 16.
 |
| Laying out blank frames |
Since I'm kind of a nerd, I wanted to see what the pictures would look like before committing to buying the prints. So I created a Word document and drew the approximate layout using auto shapes. Then I pasted the pictures I had selected into the different boxes. There are probably many easier and faster ways of doing this, but I don't know how. I was anxious to get started so I stuck with what I know.
When I was happy with the layout both online and on the floor, I was ready to hang it on the wall. Again, there are better methods for this (see Young House Love), but here's what I did. I took sheets of computer paper and taped them together until they were long enough to cover the whole gallery. Then I laid each frame on top of the paper and traced its outline.
 |
| I traced outlines on computer paper |
I measured how far from the edge the nail should go and marked that spot on the paper template. Then I hung the template on the wall and started hammering away. Here's where my plan for making the shape organic really came into play. It was so much less stressful knowing that it didn't have to be perfect because, really, that just wasn't going to happen. Most of my marks were pretty accurate, but a couple were a little bit off. No matter. It looked great anyway :)
 |
| Gallery wall with empty frames |

I really love the way it turned out! This wall is the first thing I see when I come out of my bedroom in the morning and I have a great view of it from my dressing room. It turned an ordinary wall into a happy-memory-filled art gallery. And all for less than $20!
Subscribe to:
Posts (Atom)