Sunday, March 30, 2014

Exploring Istanbul

Last week we fulfilled one of my life-long dreams and went to Istanbul. The mix of ancient and modern; sea and land; Europe and Asia--I just couldn't wait to see it in person. It did not disappoint.


We spent a long weekend there, and it was just the right amount of time. I wish we had time to explore more of Turkey, but I'll just have to come back to see Cappadocia and Ephesus. Traveling with an almost-nine-month-old means going at a much slower pace than we're used to, but I am actually really enjoying it. We get more opportunities to mingle with locals who can't seem to resist Zahara's charms.


Seriously, I don't know what it is about Turks, but they LOVED Zahara. Turkish men were especially fond of her. I've never seen anything like it. Men would pinch her cheeks and make kissing noises. Twice at a restaurant, people actually lifted her out of our arms and kissed her before passing her around the table. One man even gave us money! It was only 5 lira, but he insisted it was for good luck.


We got so lucky with great weather. We stayed near the Blue Mosque and Hagia Sofia and walked pretty much everywhere. I was surprised at how big the whole city of Istanbul is, but most of the big tourist attractions are located pretty centrally.

I'll tell you more about the big sights in my next posts, but first let me tell you about one of the best experiences I've had in a long time: an authentic hamam (Turkish bath). Dan and I researched places in advance and made bookings at Kilic Ali Pasa Hamami. This establishment is very traditional; men and women bathe separately. This actually worked out well since one of us was able to watch Zahara while the other bathed.

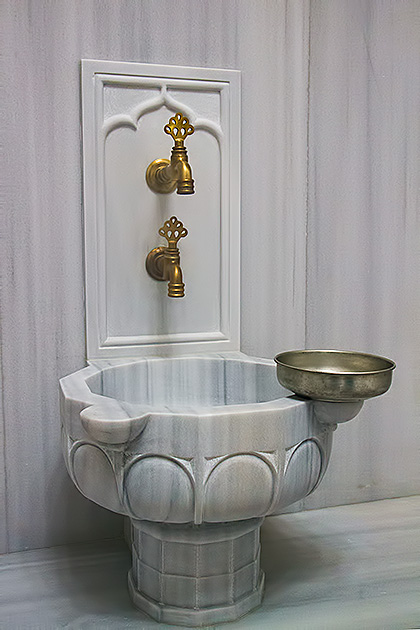
From the moment I walked in the door I was instantly transported to a state of pure zen. I was given some quince juice (so good!), a towel and some slippers. The bath was a gorgeous marble room with stunning skylights. I could have spent all day laying on the giant heated marble slab. I really enjoyed the whole process of washing, scrubbing and massaging.

Lobby [source]

My favorite part was when my lady grabbed the clean rag from the soap bucket, swung it around a few times and then wrung it out on top of me creating a giant bubble bath! It's hard to imagine, but I was covered head to toe in bubbles!

Steam Room [source]

[source]

I spent around two hours being pampered while Dan hung out with Zoey in town. He had his turn the next night when the bath opened for men. There's a Turkish Bath in Harrogate that I have yet to explore. Have you been there? Was it a similar experience?

I'll be back soon with more Istanbul highlights!

Read more about our trip to Istanbul:
Istanbul: Mosques and Markets
Istanbul: Final Thoughts

Saturday, March 29, 2014

Dear Zahara: 9 Months

Dear Zahara,

Happy nine month birthday! Thanks for another great month! You are such a happy baby, constantly smiling and cooing.


You are really showing your personality now and are developing likes and dislikes. You are the happiest when you are surrounded by people; you thrive on the attention of others. The more people smile at you, the more you laugh and clap back at them. It's infectious. You can be in the middle of a tantrum, and if someone comes over and smiles at you, you stop crying and start cooing. It's ridiculous.


Reading is one of our favorite activities. We've read the Gruffalo so often that we can say it by heart now. You love clapping along to music and when you feel proud of yourself. You learned how to wave last week. Somehow living in England has rubbed off on you because you wave like the Queen. Ha!


You are constantly on the move chasing after the kitties, grabbing the TV wires or trying to crawl into the fireplace. Mummy and daddy have to keep a close eye on you. Especially now that you started pulling up on furniture. It won't be long before you are walking.


We're happy you're such an adventurous eater. There really isn't anything you've turned down. Your current favorites are fish, bananas and clementines. You literally start squealing when you see the clementine and we can't get it to you fast enough. But you've eaten everything from raw mackerel (in the airport in Amsterdam) to pickled ginger (at a make-your-own-sushi night) to curried chicken.


We love you so much and can't wait to see what the next month brings. 

Tuesday, March 11, 2014

Chalkboard Teapot

Can you believe that I've been living in England (aka the land of tea) for more than two years, and until this weekend didn't have a teapot? For the amount of tea that I drink, and how often I host people at my house, that's ridiculous. Luckily, I found this beauty at my local thrift shop for only £5! What a steal! 


It's a great size--it can probably fit four cups--but it was a little boring, so I turned to Pinterest for some inspiration. To the surprise of no one, I fell in love with this chalkboard paint version. I can't help it. I may have a problem.

This is such an easy project that anyone can do it! It really takes no skill and no time. I'm a big fan of those kinds of projects lately. All you need is a plain teapot and some chalkboard paint meant for ceramics. I'm still using this pot that I bought nearly two years ago--a little goes a long way.    


Adorable, right? I made a template for my tea bag using scrap paper, taped it on the pot and traced around it with the paint. Once I had my outline, I painted a little circle at the top of the bag, and then filled in the rest. I added a string and painted around the rim, mimicking my inspiration photo.

I followed the instructions on the paint jar and, after 24 hours of drying, I baked my teapot in the oven at 300F for 35 minutes. Then I rubbed a piece of chalk over the paint to cure it. That's an important step because it prevents the chalk from leaving permanent marks. I missed it when I made my cheese plate, and honestly, it drives me crazy.

That's it! With a few minutes of time and a couple of bucks, I've now got the cutest teapot in the land!


Love chalkboard paint projects as much as I do? Check out some of my other ones:
Cheese Platters
Making Tea Time Pretty
Easy Upgrade
Baby, It's Cold Outside                                                                                                                                                                              

Monday, March 10, 2014

DIY Nursery Mobile

A million years ago I shared Zahara's nursery with you. My favorite thing about the room, aside from all the bright colors, is that most of the decorations are homemade. From the fabric mobile, to the cardboard "Z," to the Ikea-hacked bookshelves, I love that Zahara is surrounded by things made by the people who love her.


The mobile was a really simple project. It took me a while to do it, but only because I waited until after Zahara was born to begin. All told, you could probably complete this project in a couple of hours if you aren't trying to keep a tiny human alive. 

I found my original inspiration from Pinterest, of course. I tweaked the design to better fit my needs though. I made the ribbons shorter to accommodate the fun string ball I found for a couple of bucks at a thrift store. Dan was the one who recommended (and then implemented) hanging the mobile below the ball using dental floss. So smart!


Here's what you'll need to make you're own mobile:
  • Fabric
  • Ribbon
  • Embroidery hoop (discard the part with the screw)
  • Paint
  • Hot glue gun
  • Heat'n Bond (I used this one)
  • Iron
  • Sewing machine or needle and thread

The first thing I did was paint my embroidery hoop using some purple shiny paint leftover from this project. To paint all the way around the circle, I used needle-nosed pliers to hold the hoop as I painted. I propped it up against the top of a cardboard box to dry.


I wanted my mobile to have six ribbon strings with four fabric circles on each one, for a total of 24 finished circles. That meant I needed enough fabric to make 48 circles, so that each had a front and a back.


I traced 24 circles onto the paper side of the Heat'n Bond using a drinking glass as my template, and cut each circle out. 


I ironed one Heat'n Bond circle onto the wrong side of my fabric. Then I cut the excess fabric to leave a bonded circle. This was one half of my first circle.


I used the drinking glass again to trace and cut another circle from the same fabric. This was the other half of my circle. Repeat for a total of 24 circles.

24 circles: 1 side is plain fabric, the other side is fabric and Heat'n Bond

Next, I cut six equal strips of ribbon, leaving enough extra to attach to the embroidery hoop. I pined the circles where I thought they looked best--roughly symmetrical with the bottoms all aligned.


Once the circles were pinned where I wanted them, I peeled the backing off the Heat'n Bond and ironed the two pieces of the circle together with the ribbon between them. I added a couple stitches to the middle of each circle to keep them in place. I used a sewing machine, but you could hand sew this.

The last step was attaching the ribbon to the embroidery hoop with a hot glue gun. I just made a little loop and glued the ribbon to itself.


It sounds more complicated than it was. It is a pretty easy project that makes a huge impact. I love it, and more importantly, so does Zahara! She loves looking at the bright colors and the way the fabric moves.


Friday, March 7, 2014

She's Up!

Well, that's it. My world will never be the same again. Zahara is not only crawling, but now she's pulling on furniture to stand by herself. She will be walking before I know it. I'm not sure I'm ready for this!


P.S. If you're reading this on Feedly, the video doesn't seem to show up. Click here to view it.

Thursday, March 6, 2014

Things I Love: Speculoos Spread

You know when you try something for the first time and it's love at first bite? That's what happened to me with Speculoos spread. I'd never heard of it before Rachel brought it to my Pancake Day celebration. What is it you ask? Pure heaven. It's a cookie butter with the consistency of Nutella and a sweet gingerbread flavor.

[source]

I've loved the speculoos cookie for a long time. It's often served in cafes with tea or coffee; and on Delta airlines flights. I learned that speculoos is the generic name for the cookie, and the brand name that I am most familiar with is Biscoff made by Lotus. Did you know that these cookies have been made in a small town in Belgium since 1932? And, they've been offered as an in-flight treat since 1984?


I'm not a big fan of traditional gingerbread cookies or ginger snaps; I find them too spicy. These cookies, and this spread, are the right balance of spicy and sweet. It has a nice caramel flavor that goes perfectly with...well, anything, really.

Good news for my American friends. These European-style cookies and this delicious spread are available in the States! Here's a website that will help you track them down.

I know it seems like it, but I'm not receiving any compensation from this overly-enthusiastic review. However, if the Lotus company stumbles upon this post and would like for me to become a taster for their products, please feel free to get in touch. 

Wednesday, March 5, 2014

Pancake Day

Yesterday I celebrated a British Holiday I had never heard of a few years ago--Pancake Day. Every year, on the Tuesday before Ash Wednesday, Brits stuff their faces with crepes (which they call pancakes, and it drives Dan mad!). What's the connection? From Wikipedia:
Pancakes are associated with the day preceding Lent because they were a way to use up rich foods such as eggs, milk, and sugar, before the fasting season of the 40 days of Lent.

So what's involved in Pancake Day? Well, for me, it just involved making and then eating a ton of crepes! My mummy friends (and Nick) each brought over toppings and we dug in. We had Nutella and bananas; cookie dough ice cream; blueberries; lemon curd; broccoli, leek and cheese bechemel; and Speculoos spread (more on that tomorrow). I may have over-cooked though. I planned on five crepes per person and there were six of us. I had a ton leftover at the end, but I'm certainly not complaining!

Of course I didn't take any pictures of the fillings, or us eating the pancakes. I did capture some funny pictures of the babies though. The babies range in age from almost three months to eight months. We tried to get a group shot, with mixed success. Zahara was crying, Tom was pulling hair and eating faces, and Genevive was just trying to sit up. Though pictures aren't perfect, they are certainly memorable.

Tom going for Tilly's face
Taking a break from the ladies
Topsy turvy

At one point, I volunteered to stay in the living room with the babies while everyone else went into the kitchen to grab more pancakes. It was crazy watching six babies all at once! Thankfully, only Zahara and Tom were on the move. People came back just in time to keep Zoey from grabbing the TV cords. It looks like baby-proofing the living room just got moved higher on my to-do list.


Thanks to my British friends for introducing me to this fun celebration! As you know, any holiday that involves lots of food is a holiday I can get behind :)