Thursday, June 28, 2012

Eat, Drink and Be Merry

Food and drinks can really set the tone for any party, and I think the menu for Dan's party conveyed a sense of fun and whimsy.

  • World's best sangria*
  • Firefly vodka sweet tea
  • Non-alcoholic raspberry lemonade
  • Non-alcoholic cucumber water

    Use cheap wine and lots of fruit for sangria


    I absolutely love Firefly vodka because it tastes just like sweet tea, but you can't get it in England. Luckily for me, my friend Alisha was planning a trip to the States so she brought some back for me in time for the party.

    I made the cucumber water by puréeing two cucumbers and leaving it to strain overnight. I then added that concentrated cucumber juice to my big jug of water and tossed in some fresh cucumber slices. Easy and super refreshing!


    I thought it would be fun to serve the drinks in a glass jar. I saw some cool mason jar pictures on Pinterest, but unfortunately I couldn't get enough of them delivered to me for a reasonable price. I found other jars on a canning website that worked out perfectly though. And I bought cute little paper straws because, why not?


    Rachel enjoying the drinks
    • Chips and dips (spinach-artichoke and salsa-cheese)
    • Cheese and crackers (Wensleydale, cheddar and blue)
    • Marinated olives
    • Veggies and ranch dip
    • Baked camembert [made by Rachel]
    • Rainbow fruit skewers
    • Pizza (delivery)
    • Drunk gummy bears 
    • Corn on the cob cupcakes
    • Margarita popsicles [made by Alisha]
    • Rainbow cake [made by Katie]


    Drunk gummy bears are new to me, but I'm pretty sure this isn't the last I've seen of them. They are gummy bears that you soak in vodka overnight. Surprisingly they don't lose their shape at all. They taste kind of boozy, but fruity too. Delicious!


    I saw these corn on the cob cupcakes in the Hello, Cupcakes cookbook a while back. After seeing them again on Pinterest I knew I wanted to make them. Aren't they cute?


    You just add yellow food coloring to plain vanilla frosting and then frost yellow cake cupcakes. Add a few rows of jelly beans, sprinkle some dried mint on top, skewer with corn holders and voilà! Corn on the cob cupcakes!


    The cake that Katie made really stole the show though. I am still drooling over it. Can you believe she made it?


    Coconut icing, nutella filling, rainbow cake!!

    *I've tried a lot of sangria and this is my favorite recipe. Be warned though: it's strong!
    Slightly modified from this recipe.
    1/2 cup brandy
    1/4 cup lemon juice
    1/3 cup frozen lemonade concentrate
    1/3 cup orange juice
    1 (750 ml) bottle of dry red wine
    1/2 cup triple sec
    Any fruit you like. I like dicing up peaches, nectarines and green apple
    2 cups ginger ale

    Mix everything except the ginger ale and refrigerate overnight. Add the ginger ale just before serving.

    Wednesday, June 27, 2012

    DIY Bunting

    Now that I live in England I have a whole new appreciation for bunting. It's not that I didn't love it before, but I assumed it was only for circuses or kids parties. Here though, bunting is serious business. It's on street lamps and shop windows. People hang it outside their house and even wear it on their clothes.

    Bunting in the streets

    Bunting on clothes [source]

    I've been told there's more bunting than usual because of the Queen's Diamond Jubilee and the Olympics, but I think it's a tradition that should be maintained. That's why when I started planning Dan's birthday party, I knew I wanted to try my hand at making bunting. I even made the invitation with a bunting theme.


    I went to my local fabric store to pick out some fat quarters and cotton tape for my bunting. I wanted fabrics that were neutral and not girly. I found a great grey polka dot; a nice yellow gingham and a cool denim. The best part is that each quarter only cost me £1.50.

    I found a template online that helped me determine the size each triangle should be. You can go a lot of different ways, but I just cut out the size that seemed best suited to my space.

    Making practice triangles

    Karen was making bunting for the baby shower she was hosting so we both had big plans. We folded scrap fabric in half and cut out triangles using our template; then we used my sewing machine to sew the two triangles together. We made three practice triangles.

    The next step was to use straight pins to attach the triangles to the cotton tape and then sew straight across.

    Pinning triangles to cotton tape

    Once we determined that the practice triangles were the cutest thing ever, we moved on to making our real bunting. I ironed my fabric and cut out my triangles. The cutting actually took the longest. It would be much easier if I had a rotary cutter, but I was just using scissors.


    I was able to get eleven triangles from each fat quarter. Using my three quarters and some leftover fabric, I had thirty-seven triangles to work with. I knew I wanted bunting over the fireplace in the dining room and below the kitchen table where I planned to put food or drinks for the party so I measured those spaces and laid out my triangles in a random pattern.


    This was just trial and error; there's really no right or wrong here. Once I found a pattern I liked, I pinned the triangles in place. It makes it so much easier if you iron a crease the cotton tape first.


    With everything pinned in place I hung up the bunting as a trial run to make sure I still liked the pattern. I actually made a couple of changes before sewing everything into place.


    Making bunting wasn't hard, but it definitely took some time. In the end, it was totally worth it. I think it really added sophisticated whimsy--if such a thing exists--to the party.


    Monday, June 25, 2012

    DIY Piñata

    With the moon bounce rental sorted, Dan's kid-themed-party planning was off to a good start. Next on the list: a piñata.

    I saw some gorgeous inspiration photos on Pinterest and felt confident that I could make one myself. Rightly or wrongly, this is what happens when I browse that website. Everyone posts such great things that it makes me feel like I can do it too. It's simultaneously its greatest appeal and worst trap. Tell me I'm not alone in that, please!

    My piñata inspiration [source]

    I chose this inspiration photo because of its simplicity. There are no crazy shapes to deal with or fancy decorations. It seemed fairly straightforward--like a good beginners piñata.

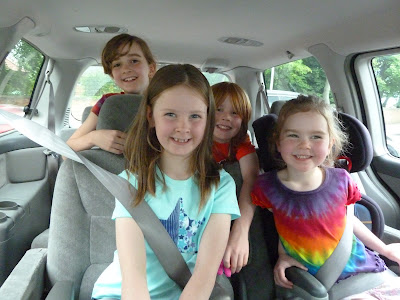
    My first step in making this piñata for myself was finding the right shaped balloon. This was actually harder than it sounds. My friend Olivia and her kids helped me with this mission though. We drove around town to a few different places before finding the perfect balloon at the florist!


    Thanks for your help, kids!

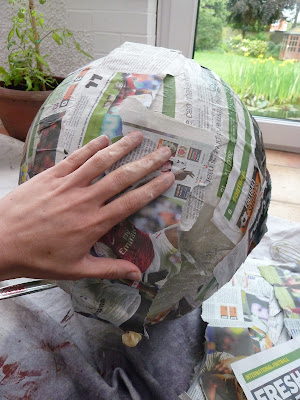
    I used the old-school papier-mache method to make the body of the piñata. Basically, you just make a flour and water paste and smear it over newspaper. Easy!

    1 cup flour, 4 cups water, pinch of salt

    The paste is done when it starts to gurgle

    I got a bunch of newspapers from the art teacher at the school (one of the perks of substitute teaching--ha!). He gave me a great tip: use alternating layers of newspaper and plain packing paper so that you can tell where your layers start and end. Brilliant.

    Tear the paper into smallish (1.5 inch) strips

    I used newspaper as the first layer because I wanted to do four layers. This would let me end with the plain white paper on the last layer. I thought it would be easier to decorate if you didn't see all the words and pictures under the crepe paper.

    Most sites tell you to do three layers max, but most sites aren't planning an adult party. I didn't want this thing coming apart at the first swing!

    Lay down a tarp: it gets messy!

    Smear paste on newspaper and layer on balloon

    Dry overnight

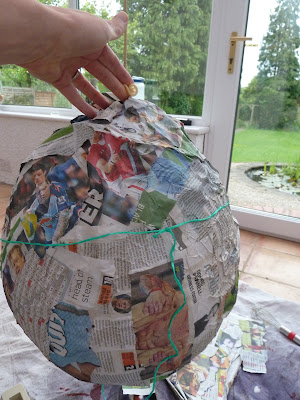
    Another tip I read was to tie a string around the balloon after the first layer. You can later use that string to tie up the piñata.


    I won't show you pictures of the next three layers because it's exactly the same method. It's really easy to do, it just takes a long time to dry.

    Once your piñata is dry but BEFORE you decorate it, it's time to fill it! Continuing the adult-kid's party theme, I filled mine with a mixture of candy and booze! Who doesn't want to find mini (plastic) bottles of liquor in their piñata?


    Candy and booze? Yes, please!

    To fill the pinata, pop the balloon (if it hasn't already popped) and fish it out. My S.O.S. friend Nick helped with this task.

    Using chopsticks to fish out the balloon

    Then cut a hole big enough to stuff your candy/booze into.


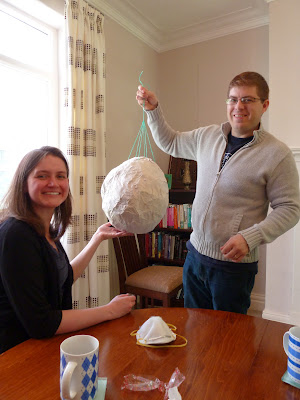
    The piñata was much heavier than I expected; the string I tied around the balloon after the first layer wasn't strong enough to hold it. Rachel and Nick suggested poking a few more holes in the piñata and lacing the string through to disperse the weight. It worked like a charm. 


    My four-layered piñata


    Tape the piñata shut and it's now ready for decorations!


    To mimic the look from my inspiration photo, I delicately wrapped yellow crepe paper around the piñata using the same method as before.


    At this point it was starting to look like a beehive! Now all I had to do was add some bees. Of course I didn't take any pictures of this because I was frantically throwing something together minutes before people were arriving for the party. All I did though was take leftover yellow crepe paper and formed it into a rough oval, trying to mimic the shape of a bee. Then I took black twist ties (the kind that come with trash bags) and wrapped them around each oval so it looked like stripes from the front. I was going to make a head and wings, but I completely ran out of time. Oh well! I taped them to the front and called it a day.


    Finished product

    Side note: I'll explain why I'm in a t-shirt and shorts at the party in a later post.

    I LOVE the way it turned out! It even held up to the birthday boy's wails, and he hit it so hard the bat broke!


    I used a metal pipe, but the piñata hung in there.


    Katie gave it a good whacking though and managed to break through.


    Booze in the bushes


    This was such a fun, easy project. I think every party should have a piñata! Who's with me?