With the moon bounce rental sorted, Dan's kid-themed-party planning was off to a good start. Next on the list: a piñata.
I saw some gorgeous inspiration photos on Pinterest and felt confident that I could make one myself. Rightly or wrongly, this is what happens when I browse that website. Everyone posts such great things that it makes me feel like I can do it too. It's simultaneously its greatest appeal and worst trap. Tell me I'm not alone in that, please!
I chose this inspiration photo because of its simplicity. There are no crazy shapes to deal with or fancy decorations. It seemed fairly straightforward--like a good beginners piñata.
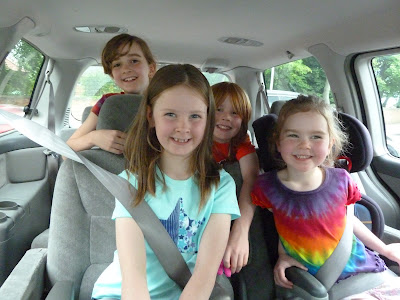
My first step in making this piñata for myself was finding the right shaped balloon. This was actually harder than it sounds. My friend Olivia and her kids helped me with this mission though. We drove around town to a few different places before finding the perfect balloon at the florist!
I saw some gorgeous inspiration photos on Pinterest and felt confident that I could make one myself. Rightly or wrongly, this is what happens when I browse that website. Everyone posts such great things that it makes me feel like I can do it too. It's simultaneously its greatest appeal and worst trap. Tell me I'm not alone in that, please!
 |
| My piñata inspiration [source] |
I chose this inspiration photo because of its simplicity. There are no crazy shapes to deal with or fancy decorations. It seemed fairly straightforward--like a good beginners piñata.
My first step in making this piñata for myself was finding the right shaped balloon. This was actually harder than it sounds. My friend Olivia and her kids helped me with this mission though. We drove around town to a few different places before finding the perfect balloon at the florist!
 |
| Thanks for your help, kids! |
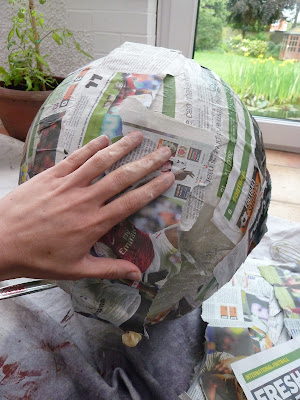
I used the old-school papier-mache method to make the body of the piñata. Basically, you just make a flour and water paste and smear it over newspaper. Easy!
 |
| 1 cup flour, 4 cups water, pinch of salt |
 |
| The paste is done when it starts to gurgle |
I got a bunch of newspapers from the art teacher at the school (one of the perks of substitute teaching--ha!). He gave me a great tip: use alternating layers of newspaper and plain packing paper so that you can tell where your layers start and end. Brilliant.
 |
| Tear the paper into smallish (1.5 inch) strips |
I used newspaper as the first layer because I wanted to do four layers. This would let me end with the plain white paper on the last layer. I thought it would be easier to decorate if you didn't see all the words and pictures under the crepe paper.
Most sites tell you to do three layers max, but most sites aren't planning an adult party. I didn't want this thing coming apart at the first swing!
 |
| Lay down a tarp: it gets messy! |
 |
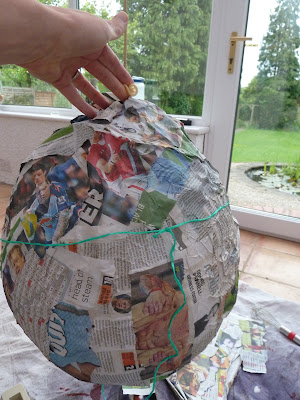
| Smear paste on newspaper and layer on balloon |
 |
| Dry overnight |
Another tip I read was to tie a string around the balloon after the first layer. You can later use that string to tie up the piñata.
I won't show you pictures of the next three layers because it's exactly the same method. It's really easy to do, it just takes a long time to dry.
Once your piñata is dry but BEFORE you decorate it, it's time to fill it! Continuing the adult-kid's party theme, I filled mine with a mixture of candy and booze! Who doesn't want to find mini (plastic) bottles of liquor in their piñata?
 |
| Candy and booze? Yes, please! |
To fill the pinata, pop the balloon (if it hasn't already popped) and fish it out. My S.O.S. friend Nick helped with this task.
 |
| Using chopsticks to fish out the balloon |
Then cut a hole big enough to stuff your candy/booze into.
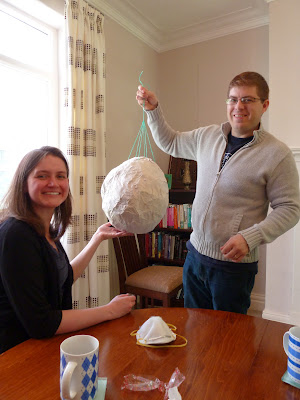
The piñata was much heavier than I expected; the string I tied around the balloon after the first layer wasn't strong enough to hold it. Rachel and Nick suggested poking a few more holes in the piñata and lacing the string through to disperse the weight. It worked like a charm.
To mimic the look from my inspiration photo, I delicately wrapped yellow crepe paper around the piñata using the same method as before.
 |
| Finished product |
Side note: I'll explain why I'm in a t-shirt and shorts at the party in a later post.
I LOVE the way it turned out! It even held up to the birthday boy's wails, and he hit it so hard the bat broke!
I used a metal pipe, but the piñata hung in there.
Katie gave it a good whacking though and managed to break through.
 |
| Booze in the bushes |
This was such a fun, easy project. I think every party should have a piñata! Who's with me?


I want a pinata! Maybe this just further proves that I am a big kid.
ReplyDeletePinatas are awesome! I'm glad I'm not alone in this realization :)
DeleteIt came out so well! You are awesome!!!
ReplyDeleteThanks Katie! And thanks for all of your help!!
Deletegood going, Cal....Dan is SO lucky to have such a creative, fun wife who has such nice parents!
ReplyDeleteYour pinata looked excellent! It's funny we both included a pinata in our husband's 30th birthday celebrations. Maybe we both married big kids? :)
ReplyDeleteI am so glad that we sent you to some of the finest schools to become a wold famous party planner. We are Kfelling here. For those who do not know what that means we are so proud.
ReplyDeleteLove,
Dad
world
Delete