My best friend's baby just turned one this week. I am still in shock that Katie has a baby, let alone a one year old! Austin is like a real person now. Last I saw her, she looked like this:
 |
| Austin: 3 weeks old |
I moved to England just a few weeks after Austin was born, but I've been able to watch her grow up through Skype and Facebook. Isn't technology amazing?
I wanted to make something special to celebrate this huge milestone. When I saw a tutorial for plush alphabet letters I thought it fit the bill nicely.
I knew this would be a challenge, especially since I am just learning how to sew, but I was encouraged by this statement in the tutorial:
Who's going to care if you the hole you cut out on the letter "O" is a little wonky? I won't--I mean, look at that hole on my own letter "O" above. This pot will not be calling any kettles black.
Free license to make my letters wonky? I'll take it!
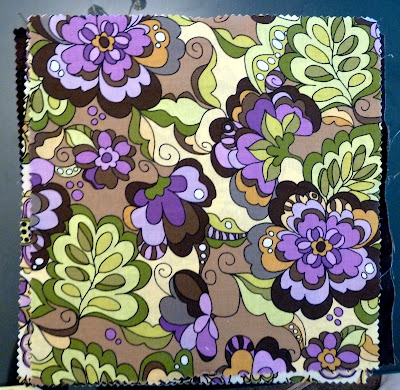
My first step in making these letters was to get the fabric. I went to my local fabric store, but they didn't have what I was looking for. After doing some research online, I discovered that I needed a "layer cake" which is 20-40 10" inch squares of coordinating fabric. I fell in love with this fabric from the
Missouri Star Quilting Company:
 |
| Fiona's Fancy 10" Squares by Lila Tueller for Riley Blake Designs |
I also bought batting and magnets online. Initially I intended to make the letters magnetic; however, magnets are very toxic if swallowed. I didn't trust my sewing enough to guarantee that the seams wouldn't rip and the magnet wouldn't come out. I made the first several letters into magnets, but decided halfway through to abandon that. Luckily it was easy to take the magnets out and make them plush toys instead.
I cut fifty-two 4 inch squares of batting--I used two squares for each letter. You really don't need to cut exact squares though. Each letter is pretty small (only around an inch), so it might be better to cut as you go rather than doing them all the same size in advance.
 |
| Batting |
 |
| They really are super strong! |
The tutorial from
Chez Beeper Bebe included printouts for the letters. You can use any font you like though. I appreciated that these had as few curves as possible :)
Now that I had my fabric, batting and letters, it was time to get started. I arranged the fabrics in a way that was pleasing to my eye and grabbed my "z" fabric.
Following the tutorial, I traced my letter in reverse onto small pieces of folded fabric and then placed the batting in between the layers.
Since I initially planned to make these into magnets, I put the magnet in between the fabric and first layer of batting. This put the magnet at the back of the finished letter (because I traced the letter in reverse).
Then I sewed the letter, following the lines I traced. At this point I realized I like some letters way more than other letters. Z is always welcome in my home--S, not so much.
 |
| Nice straight lines |
 |
| Lots of mean curves |
This project took me a while, mostly because I'm such a novice sewer. For someone who actually knows how to sew, it is a relatively easy project. I think they turned out great though. Definitely wonky and homemade, but pretty cute.
I used some leftover fabric to made a quick draw-string bag for the letters.
I am so thrilled by the way these turned out. I'm even happier to hear that Austin is enjoying them!
Happy birthday Austin!! Aunt Calli loves you :)


