Last month I showed you how I transformed two chairs I scored at the auction into bright, happy purple kitchen chairs.
 |
| From this... |
 |
| ...to this |
I still love the purple gloss, but I wasn't so in love with the straw cushion. It wasn't very comfortable, and isn't really my style at all. I wanted a softer, prettier cushion...so I made one!
 |
| New cushion! |
This was actually a pretty easy fix that anyone can do. It doesn't take too much time or money, but makes a big difference.
Initially I thought about just covering the straw seat with fabric and calling it a day. But I really wanted it to be padded. Plus, the seat sits flush in the frame of the chair, so if I increased the size of the seat it might not fit in the frame any more.
I talked to someone at the fabric store to see what she would recommend. She told me to buy a foam insert, good quality fabric and upholstery webbing. I loved the idea of using a foam insert instead of stuffing because it is easier to work with and won't sag and bunch like stuffing might. But I wasn't sold on the upholstery webbing idea. I was worried that if I didn't secure it tight enough someone would just fall right through the center.
 |
| Foam insert |
Instead, I decided to use plywood to provide support. I lucked out because when I went to buy the plywood, the guy at the hardware store told me that my straw seat actually had a wood frame inside it. I could attach plywood to that frame to make it extra secure. And I got extra lucky when I saw free plywood in the scraps pile. They even cut it to size for free! Awesome!
The first step in making this cushion come to life was rescuing the wood frame from inside the straw seat. I will never look at straw seating the same again. I could not believe how well-made and tightly woven this was! It made a massive mess, filling up nearly an entire trash bag!
 |
| Original straw seat |
 |
| Use a utility knife to cut through the straw |
 |
| Straw filling |
 |
| I found the frame! |
At least I found one use for my old Henry.
Now that I had the wood frame, my next step was to attach the plywood to it. I used wood glue and clamps to make it nice and secure.
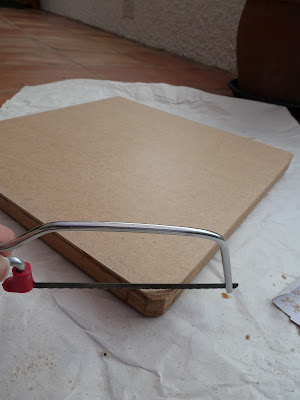
The plywood was square, but the wood frame had beveled edges. All I had to do was saw off the corner using a tiny hacksaw.
 |
| Slight overhang |
 |
| Saw off the excess |
 |
| Nice and even |
Now the frame is ready to be covered. I chose not to glue the foam to the frame; I planned on making the fabric nice and taut so the foam will stay in place on its own.
An embarrassing secret about me is that I have absolutely no idea how to make hospital corners. When I make beds or wrap presents, it looks like a first grader did it. I knew that it was really important for these corners to look sharp though, so I turned to my friends Adam and Olivia for help. Thanks to the awesome powers of Skype video they were able to walk me through it.
 |
| Lay the frame and foam on the fabric and then wrap it like a gift |
Unfortunately it's a two-handed (ideally four-handed) job, so I didn't get any pictures of me stapling the fabric to the frame. If you know how to wrap a present though, you can do this. If not, call Adam and Olivia :)
 |
| Nice tight corner |
And that's it! Here's the final product. I think this is one of my favorite makeovers so far!


Great job!! So much detail...you need to be in a magazine.
ReplyDeleteLove,
Mom
Thanks mom!
DeleteImpressive!
ReplyDeleteWow! Those look great! You're turning into quite the DIY-er :)
ReplyDeleteWell done, Calli! Your favorite fabric comes to fruition!
ReplyDeleteThanks guys! I'm blushing! You're too kind :)
ReplyDeleteAbsolutely a great job! The chair looks brand new and actually much better than it ever did! Love the blue paint!
ReplyDelete