Dan had a couple of pairs of jeans whose best days were clearly behind them. He was preparing to throw them out, but I thought I could do something fun with them. After spending some time with my good friend Pinterest, I found this beauty:
.JPG)


.JPG)

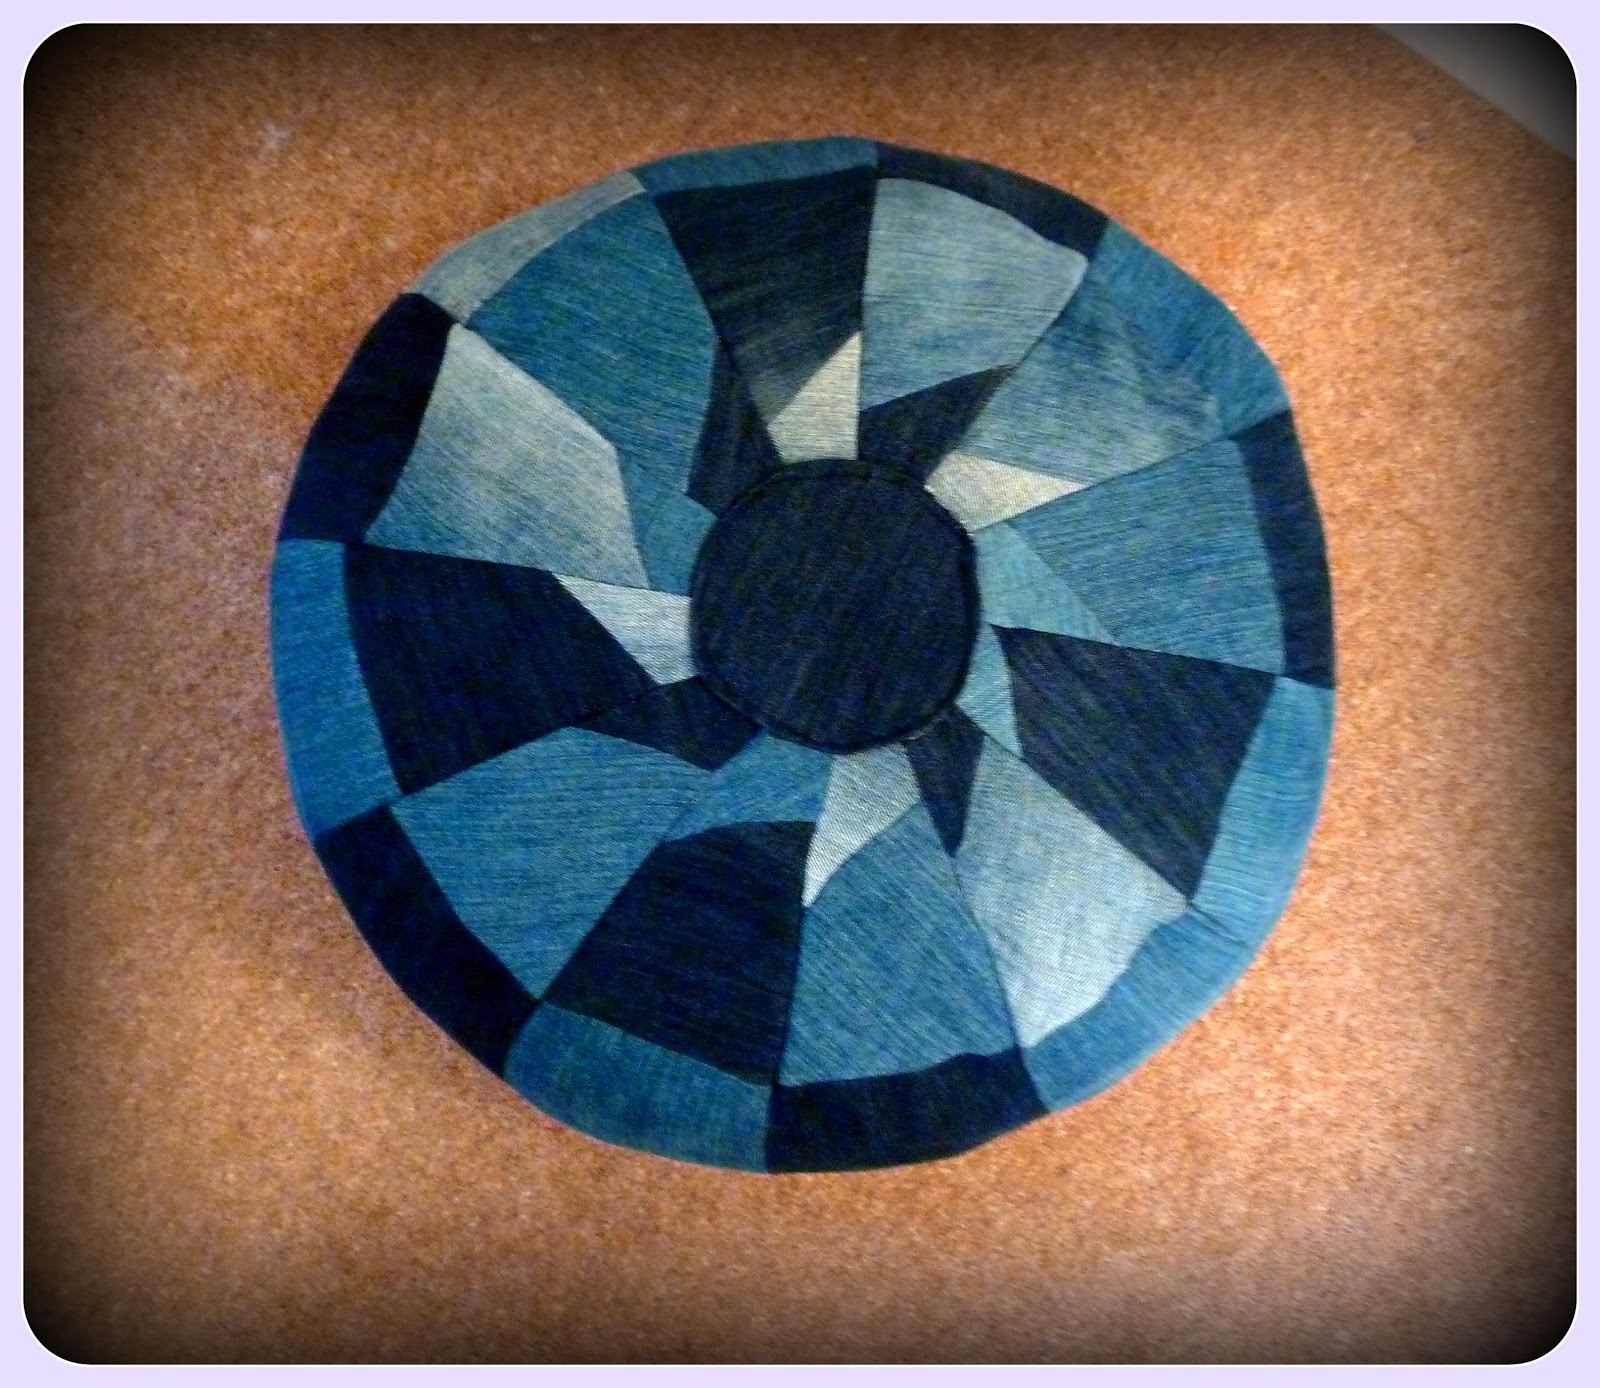
Although I'm a professional seamstress now (haha!), this still looked pretty intimidating. The original tutorial had lots of pictures though, so I thought I could muddle through it. Spoiler alert: it was hard, but I did it! Here's my final product:
.JPG)
I worked on-and-off on this project for a couple of weeks, just doing a bit at a time so I wouldn't get overwhelmed. Now that I've done it once though, it's really not that bad. In fact, I've already made a second one!
Here's what you need to make one of your very own:
Tutorial slightly adapted from here:
Materials:
- 2-3 pairs of old jeans in different shades
- Three large piece of scrap paper (e.g. craft paper)
- Protractor (I printed mine from here)
- Paper templates for each piece of denim (see step 2)
- Pair of scissors
- Sewing machine
- Ruler and pencil
- Straight pins
- Needle and thread
- Stuffing (I used the stuffing from 5 cushions that I found for cheap at the thrift store)
- Iron
- On a large piece of paper, draw an 18-inch circle. If you have a compass use that. Otherwise, fake it by measuring and cutting a 9 inch piece of string. Tie each end of the string to a pen or pencil. Put one pen in the center of your paper and draw a circle using the other pen, keeping the string vertical and taut.
- Use a protractor (I printed mine online) to mark a 30° wedge. Draw a 10-inch rectangle beneath one of the wedges so the top of the rectangle borders the bottom of the wedge. Divide the wedge from the bottom rectangle with a straight line. Divide the wedge in two with a diagonal line. Cut off the top inch of the wedge. Add a 1/4 seam allowance to every side of the three shapes and cut them out. These are the pouf templates.
- Cut out 4 each of 3 different shades of denim. I only had two pair of jeans (dark and medium) so I tried to bleach one pair. The bleach didn't take, but my pouf still looks great. Use what you've got!
- Pin three pieces together to form a house (top of wedge, bottom of wedge, rectangle), mixing shades of denim as you go. You'll make 12 houses. Iron each piece.
- Take the top part of the wedge and fold it over the bottom part of the wedge so that right sides are facing each other. Sew the pieces together, overlapping the edges by 1/4 inch. This will put the seams on the inside of the fabric so it looks seamless on the outside.
- Now attach this complete wedge to the bottom rectangle by again lining them up and then folding them together with the right sides facing each other. In the picture you'll see that I attached the rectangle and bottom wedge before adding the top wedge. Either way works fine. Repeat these steps for all 12 houses.

 |
| [source] |


7. Pin two house shapes right sides together. Align the joint between the wedges and rectangle pieces. Stitch along one side of the house with a 1/4 inch seam allowance. Again, you're sewing with right sides together so the seams are not visible from the front. Add the next house to the sewn set of two and stitch along one side with a 1/4 inch seam allowance. Repeat this step until all the houses are sewn together. Join the two end houses by stitching them right-sides together. When you're finished, you'll have a circle with a small hole on top and a large hole on the bottom.
8. To finish the top of the pouf, cut two 5 inch circles, one out of denim and one out of another fabric scrap. Pin the circles right sides together.
9. Stitch the circles together with a 1/2 inch seam allowance, leaving a few inches open for turning. Cut tiny wedges out of the circle's seam allowance avoiding the opening. This will prevent bunching once you turn the circle right-side-out. Turn the circle right-side-out and press. Tuck in the excess fabric on the opening and sew closed.
10. Pin the circle, denim side up, to the center top of the pouf. Stitch in place with a coordinating or matching thread. These stitches will be visible.

11. Cut out an 18 inch denim circle. I used one whole pant leg to get a full circle, but you can use two halves as well. Draw twelve 30 degree wedges on your denim circle using the protractor.
12. Match the lines you marked in step 11 with the joints of each house and sew the denim circle to the pouf, right sides together using a 1/2 inch seam allowance, leaving an opening for turning.
13. Stuff your pouf. I used five cushions I got for a total of $5.75 at a charity shop.
14. Sew the opening shut.

And that's it! You've made a denim pouf. I'm so happy with how it turned out. Let me know if you make one too. I'd love to see your version!
.JPG)
Came out great!!! Nice job!
ReplyDeleteThat looks like so much work and very intimdating! Good job, it looks excellent!
ReplyDeleteYou have WAY more patience and know-how than I do! The pouf looks great! I'm slitting my eyeballs just thinking about trying to make my (much simpler) halloween costume.
ReplyDeleteThanks, ladies! It actually wasn't so bad once I figured out what the heck I was doing.
ReplyDeleteIt looks great. I'm working on one right now, from the same source, and have decided to use the scrap material left over from the jeans for some of the filling. No leftovers! I'll let you know,how it goes.
ReplyDeleteWhat a smart idea! Let me know how it turns out!
DeleteYour pouf turned out great - how clever to use old jeans too! I've got this linked to my poufs post too today, well done!
ReplyDeleteThanks so much Heather! And thanks for the shout-out on your blog!
DeleteIt looks great. But what about leaving the trousers pockets so you can use it to do something in at the sides of the pouf?
ReplyDeleteWhat a great idea! I'd never thought of it!
DeleteSehr, sehr schön und lieb Danke für die Anleitung.
ReplyDelete