Well, I'm a day late and a dollar short, but happy belated Thanksgiving!! I love this holiday so much. I mean, what's not to love? It's a whole day devoted to food, family and friends.
Dan and I, along with our friends Katie and Jon, hosted Thanksgiving dinner for 25. It was a lot of work, but totally worth the effort. I'll write a more detailed post on the party details next week.
In the meantime, here's a how-to for a simple table runner. This project is really easy--anyone can do it! I bought a few yards of burlap and cut it to size. I went with around 8 feet long by 2 feet wide. I should have made it longer, but that was all the burlap I had. Use what you've got, people.

Then I pinned and sewed a 1/2 inch hem on each long side. I wanted it to look finished from the back too, so after I hemmed it the first time, I folded it over to hem it again. I used a burnt orange color to give it a "fall" feel.
To do that, I folded the short edge into a triangle and pinned each of the sides down with a 1/2 hem.

I ran the hem through my sewing machine, which left me with a large triangular piece of excess fabric.

I cut off the excess and then hemmed it one more time like I did for the long sides. Now the hem is finished all the way around.
I stenciled the two ends of my runner to give it a more polished look. I tried to buy a stencil, but I couldn't find one that I liked. Instead, I took inspiration from Katie's silhouette project and made my own. This was much easier than I thought it would be. I simply went into Microsoft Word, found a pretty font and printed an "L" for my last name. I used Harlow Solid Italic in 300 point font.

I used an x-acto knife to cut out the black portion of the paper. I cut out the two loops in the top and bottom of the L separately and taped those back in place once I positioned my stencil on the burlap. I used masking tape to hold it all in place. It worked great!

I smoothed down the stencil making sure that the paper was as flat as I could get it so that my lines would be clean. I used acrylic paint and a fine paint brush to paint a thin, even coat.

While the paint was still wet, I peeled the stencil off the burlap and was left with this:

I can't believe how perfectly it turned out! I loved it immediately.
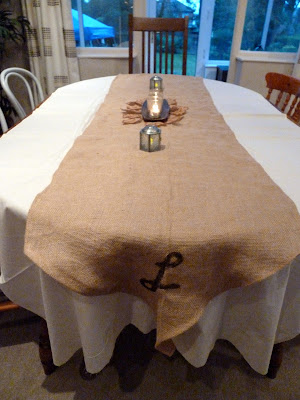
I did the same thing to the other side of the runner. Once everything was dry, my DIY runner was good to go. Here it is all gussied up and ready for the party.
I hope you had a wonderful Thanksgiving. I know I did!
Dan and I, along with our friends Katie and Jon, hosted Thanksgiving dinner for 25. It was a lot of work, but totally worth the effort. I'll write a more detailed post on the party details next week.
In the meantime, here's a how-to for a simple table runner. This project is really easy--anyone can do it! I bought a few yards of burlap and cut it to size. I went with around 8 feet long by 2 feet wide. I should have made it longer, but that was all the burlap I had. Use what you've got, people.

 |
| Burlap |
Then I pinned and sewed a 1/2 inch hem on each long side. I wanted it to look finished from the back too, so after I hemmed it the first time, I folded it over to hem it again. I used a burnt orange color to give it a "fall" feel.
 |
| Hemmed once |
 |
| Pinning to finish hem |
Once the long sides were finished, I moved on to the short sides. I wanted to make a pointed edge like this one:
 |
| [source] |
To do that, I folded the short edge into a triangle and pinned each of the sides down with a 1/2 hem.

I ran the hem through my sewing machine, which left me with a large triangular piece of excess fabric.

I cut off the excess and then hemmed it one more time like I did for the long sides. Now the hem is finished all the way around.
I stenciled the two ends of my runner to give it a more polished look. I tried to buy a stencil, but I couldn't find one that I liked. Instead, I took inspiration from Katie's silhouette project and made my own. This was much easier than I thought it would be. I simply went into Microsoft Word, found a pretty font and printed an "L" for my last name. I used Harlow Solid Italic in 300 point font.

I used an x-acto knife to cut out the black portion of the paper. I cut out the two loops in the top and bottom of the L separately and taped those back in place once I positioned my stencil on the burlap. I used masking tape to hold it all in place. It worked great!

I smoothed down the stencil making sure that the paper was as flat as I could get it so that my lines would be clean. I used acrylic paint and a fine paint brush to paint a thin, even coat.
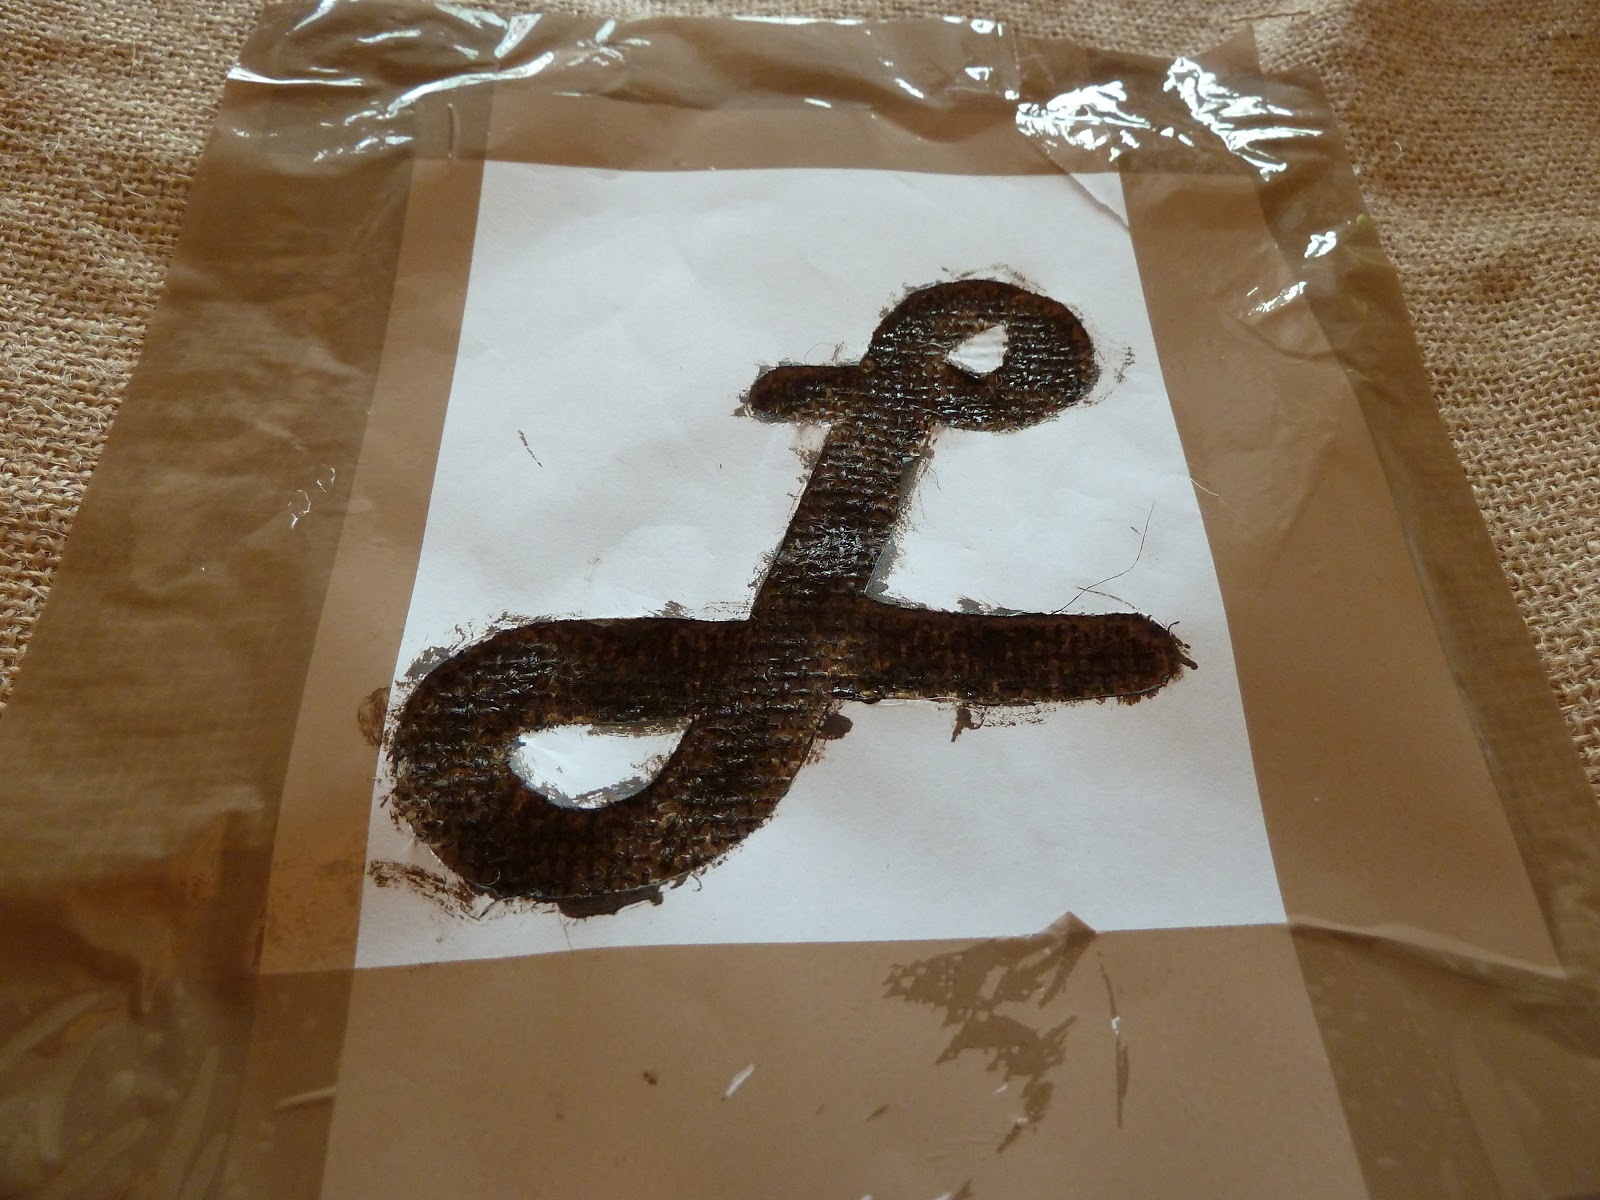
While the paint was still wet, I peeled the stencil off the burlap and was left with this:

I can't believe how perfectly it turned out! I loved it immediately.
I did the same thing to the other side of the runner. Once everything was dry, my DIY runner was good to go. Here it is all gussied up and ready for the party.

I hope you had a wonderful Thanksgiving. I know I did!
No comments:
Post a Comment